
On to Part 3
1st November 2016
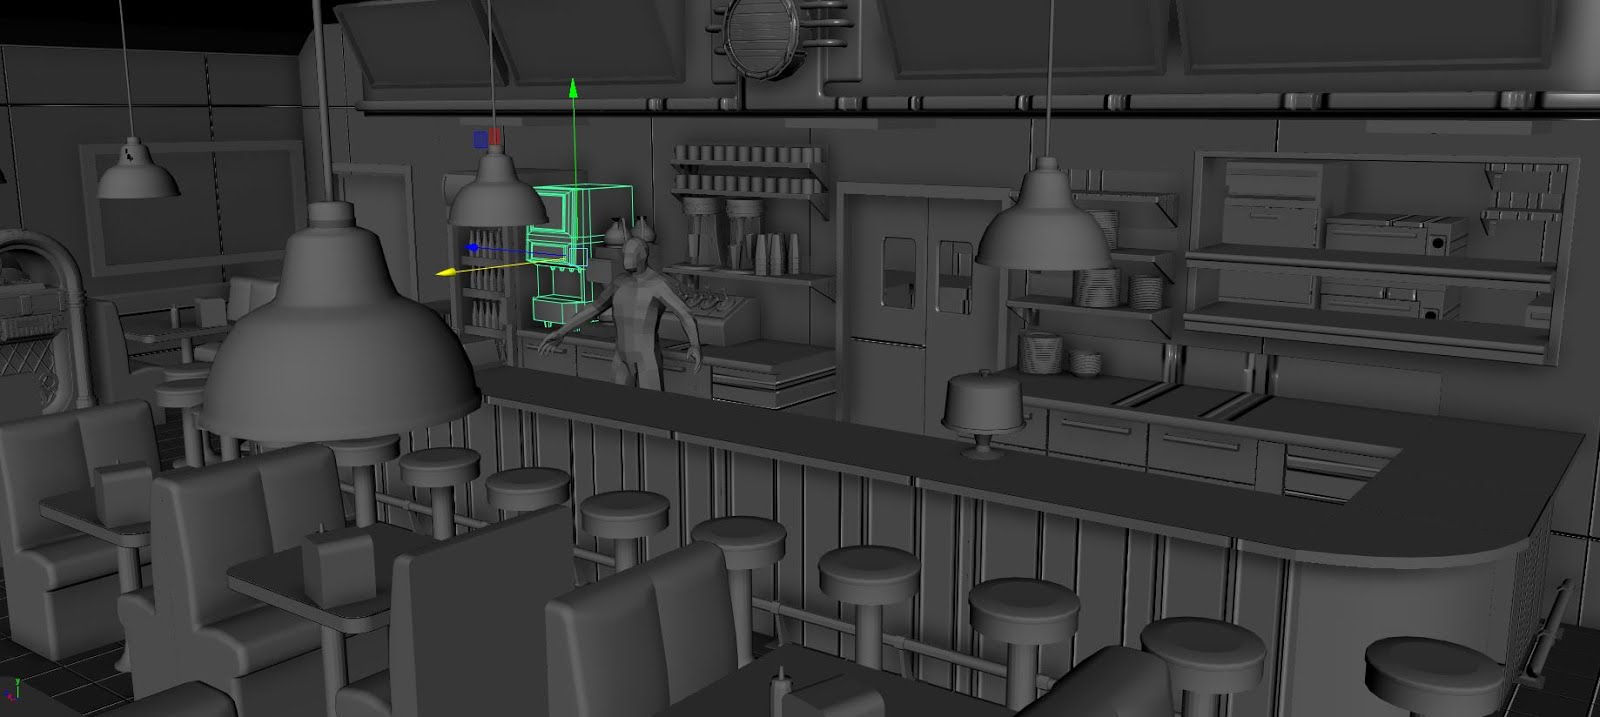
Spent more time on the counter area, bit by bit it’s looking like a diner.
The back wall has been worked on and the clock area has had a change, still got a bit of work to be done on it, like trim of the. The shelves have been added to the diner window.
Just started on the milk shaker machine, going to take me a couple of days to sort that out.

A view from the other side of the diner.


What I must do is clean up the meshes that are going to be used, name all the assets, start UV Mapping and move on to texturing the environment walls and floors.
2nd November 2016
Another day, another model, the milkshake machines brings all the monsters to the yard, damn right, their thirsty y’all. One display at the on the counter.
My sole focus was on milkshake machine I am happy with what I have done.

There are the mesh and the flavour taps, I have no idea what they are actually called.

More of the interior of the diner, getting better.
3rd November 2016
Some of my days were spent on Unwrapping UV’s of props.

Restroom handles for cubicle and entrance.

And the kitchen backdoor with handle,

Cleaned up the open sign, at the moment it is hovering, I must add something that is holding it in place.

First, step making the outside pavement area for the game.

Further, work on on the meshes.

Next variations of pavements, a few more corner variations

Now, added a floor to the environment, now it looks like it’s not floating, looking nicer.
Played around with the new variation with the logo.

Detail above the counter, broken up and made modular. Ignore the cars, yes, they are cars. Simple blocks.

Cleaned and looking better above over the counter

Another shot of the outside of the diner.


Another angle. I got to stop doing this and there are nice vans on the left.

The Diner is coming on nicely and enjoying how’s it looking, more to do.
The next step is work more on the interior of the diner, again, especially above and around the counter.
The Diner needs more tacky stuff and asset list must be created. Can’t wait for texturing, when I do, I am going to start small.
Lastly the back of the Diner, I don’t think I’ve shown it. However, here it is. As we progress from here, I think it will change a lot more, I have not decided about the bins and power line locations.

Headus UV texture unwrapper I cannot live without it. Unwrapping textures is so much easier, quicker and better than using Mayas own version. In Maya, I’m constantly fighting the software to get the UV’S unwrapped correctly, it should no fight you, let it be challenging to work out the best solution. But not work against you. A job that takes ten minutes on Headus UV, took nearly an hour in Maya. One bit of Maya I still don’t like.
14th November 2016
So much UV unwrapping, dear god, so much. HELP!! Actually, I’m getting through them. I just want to texture. These are some of them.
Power pole sorted out the UV for the mesh. I see a lot of space to fill.

The seat UV has been done for the single sided seat and double sided.

Going from a UV mess to more of coherent UVs for the assets, damn, they were a mess.

So much unwrapping and still more to do, even when using Headus UV layout tool. there is a more left to do. Added scaffolding to the neon sign, it looked liked it was floating.

With the wireframe mode switched on.
I may need to refine it a little bit the scaffolding.

Probably make an update to the scaffolding. But for now, I am going to do more unwrapping and cleaning. I’m getting faster with the unwrapping, finding shortcuts and using quicker methods to get the unwrapping done.
16th November 2016
More unwrapping today with a little modelling. Fixed the entrance area of the diner, the vestibule area. Took time trying to fix and make it look good.
All the doors and doorways have been unwrapped, the tower part of the roof has been unwrapped too. So much unwrapping and more left, just glad that it is getting there.
Ominously looking up at the Diner sign.

When through a couple of variations with the scaffolding that holds up the diner sign and was happy with this version.


From the front. Currently, the sign looks too high on the roof and leaves a large gap below it, I really need to fix that.

I really want to get texturing, I really want to texture this as soon a possible. I may need to start simple and small to get my head around materials.

17th November 2016
Today was more unwrapping, yep, that thing, it is getting there and there is more to do. I had to find a few models that got lost and wrong unwrapped versions kept, found them, sorted them out and not to delete it all again by accidently, I’ve added them onto a layer, completely locked. I am not going through that again.

Played around with Quixel a bit, made really rough textures, not good, going to try again tomorrow and make sure I do them correctly, I really need to get texturing, this unwrapping is killing me and this grey is getting to me. I really need to get some colour in the environment, ok, I shall promise myself to get texturing tomorrow, as the unwrapping is killing me and I can revisit it another time. I am going to experiment with texturing tomorrow. oh my god I forgot, I got to do light maps!. Crap.
Here is the first colour bit…. Not great, just a nice start.

18th November 2016
A bit of that, a bit of this today, Unwrapping the Juke box, holy moly, I thought I was in hell. Took so much time to unwrap the Juke box, even using Headus UV…… Always unwrap as you go.
After that, started to create colour ID maps, at first I had to remind myself how to do it, as I had not done it for awhile. But a quick refresh and I were off colour ID Mapping.

From A mess of UV to organised UV, then to Colour map, slowly and surely I will get there.
A side note, when following a tutorial online that shows how to bake a certain way and that is an introduction, it is really important that they do not leave out crucial detail in the tutorials. Drove me nuts for a little while, thank god for comments below the video, saved me from going crazy.
Even with a cartoony style, I am going to try and add materials to the surfaces of the meshes and make surfaces a little shiny.
After this experiment with the colour ID map, I am going to jump on the Diner sign and get an ID map going.
21 November 2016
Round one under way. Yeah, I’ve forgotten how to PBR texture, dear lord, currently, working to remember how to use ID Maps and how to use Quixel. It is easy, I just got to refresh my memory with it.

It is just a bit of knowledge gap with some aspects, I’ll remember it. Like why is the pink and yellow are behaving and using the ID map and the rest if the model not? ….. Not Happy, not happy, round one goes to you. But round two is coming up and I will figure that out.
Texture software not behaving, when it should do and the have a half working sign.

Will stop for now and return, however, I will need to be reading and look at tutorials of what I am missing, not the best-looking start, but it is a start. 😃
After getting fed up with the texturing, well not fed up, just a bit bruised. I decided to model cars for the exterior, as the placeholder cars, looked too funny.
Took the placeholder model and started working on it.

Shaping it into a car shape

Got a low poly car, well half a car,

A little bit more messing around and got a car finally, now the next step was to make a few variations.

With a little pushing, pulling and reshaping created five variations of cars. some late afternoon work and made some variations of the car. I was happy surprised how quickly I produced the cars

Here are their backsides. As they are generic cars, based on American 1980’s cars, I also did the backs, so that I can have some of the cars rotated and break the repetition of similar look of the car.

Then when the cars are placed in the scene, it is nicely coming together.
I got a few more cars, trucks and vans to make. Perhaps, I will add some more detail variations, I may add suitcases on top of the saloon car, give it
The view from the inside.

With the cars I create, I will keep the polycount low, actually, the entire scene is low going to be low poly in style. I am going to take some inspiration from the style of the of the van and use emissive maps for the rear lights and headlights.

More work to be done and when I came back, I am going to this time retry texturing again, it is going to be a week of two of learning the software. I forgot, I got more unwrapping to do.
what I must do for the next two weeks, is focus just on texturing, that’s what I should do.
I’m off.22nd November 2016
Had a day away from work, as I had to sort out a few things out.
Then in the evening I jumped on PC and made a couple of trucks variations. Pretty proud of that, getting faster with modelling and that makes me happy.
I want to make another couple variations, one with a roof to the back part, and more head lights with a roll cage on the roof of the truck.

View of the trucks in the environment. I am getting excited about this environment, going to add a roof rack and suitcases on top of the waggon car, the right side of the image.

Display edges switched on and looking good.

Back view of the Diner with the new vehicles. Have not shown this place much, I do need to build more outside of the environment so it does not look like it goes into empty space.

Here are the next placeholders to get replaced. Two trucks and a van to create, I will get that done tomorrow, the trucks will be easy to do as I can build one up and then modify it, the same way as I have modelled the cars and trucks.

Done a couple of renders, yeah I shouldn’t have, however, grey was driving me nuts. Won’t do this all the time, as it’s time-consuming and the assets have to be in the game engine.

I do like how the assets are looking.

I really want to get texturing, I shall do that tomorrow. Right now some rest and then more work tomorrow.
23 November 2016
Trucks, trucks and trucks. Took the place holder meshes and reworked them.

To this

Here are both the trucks were done, second truck chassis was created from the placeholder truck.

Some renders,


The populating is going well.

I got to stop rendering. Some bits on them need to be fixed, however, I am happy.
Next, the Mystery Van started with another placeholder

Shaping it quickly.

More shaping and front detail.
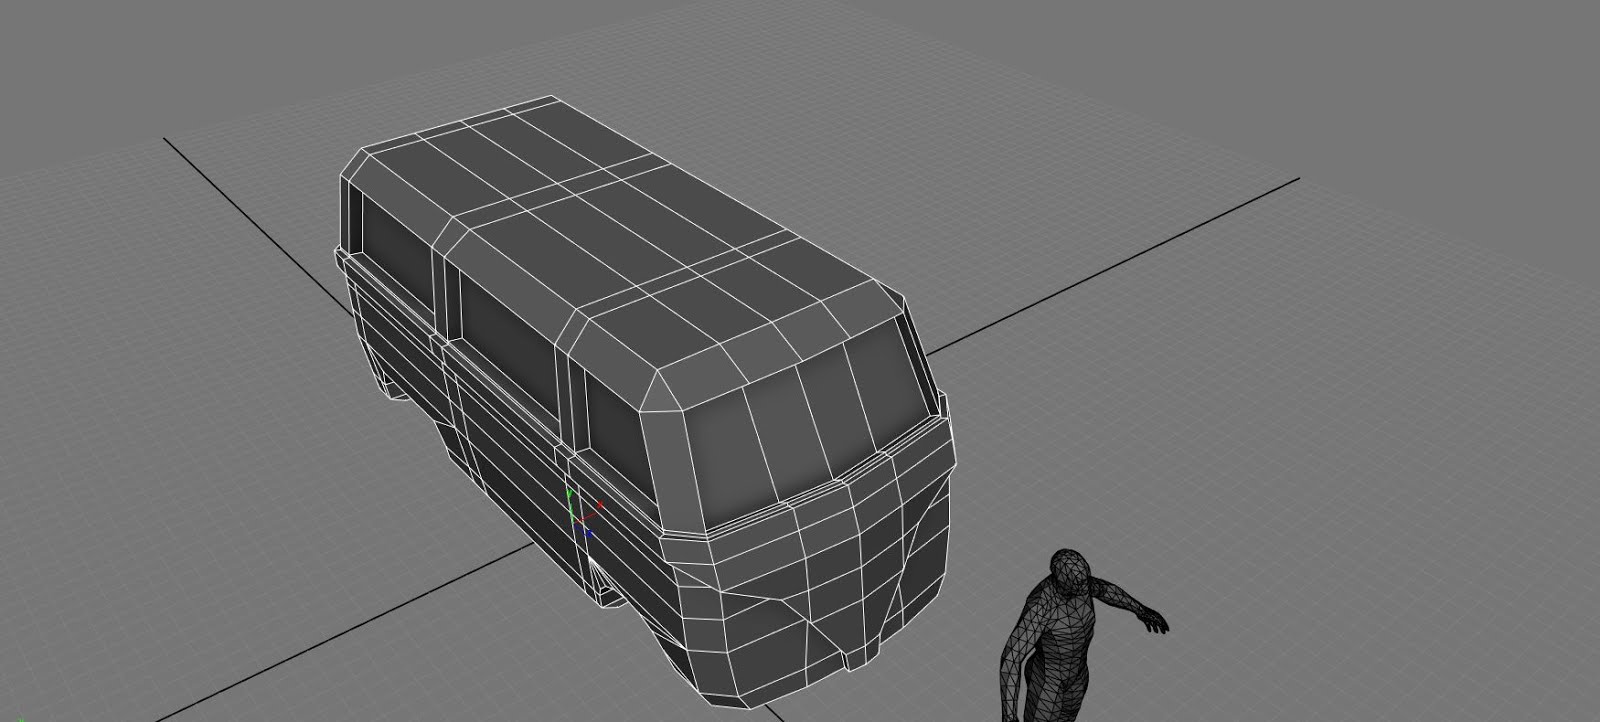
Tada, I got to stop doing that. Here is the Mystery van, I need to add, rear view mirrors. Well, it’s going to be a few days of unwrapping.

Ok, NO MORE cars, I am stopping, I have done all the cars.
I know that the game is set inside the diner and I added extra work for myself on top, it was not necessary, I think it was portfolio work. If I was at work and had a list to do, I would stick to that list and not deviate from that list.
Added the luggage onto the car roof rack, it may add rope to it, for now, I shall pass and come back to it later.

Outside view.

Outside view, you know, I am pretty chuffed, I like it more. It’s getting there.

Next step, is texturing, I must just texture.
2nd December 2016
Yikes, I’ve been away for a little. Making Christmas cards, visiting doctors, I can smell again.
For a few days, I have been wrapping my head around the texturing with Materials, especially with Quixel and since the last time I started, I am beginning to understand the software more. Getting better is a good word to use, it has been a learning process and trial and error, where some things made sense and others it did not.
For the first few days, it’s mainly learning how to use the software and finding out the pipeline process as you’re thinking more about how the program works instead of creating the art looper.
5th December 2016
Back to texturing, today, I want to texture more of the environment and get some WIP images up. Well, hasn’t been the most successful day with work progress, but little progress and some real learning. I am a little annoyed with myself, but when we learn new tools, progress of work show is non-existent. However, it was a whole lot of learning. 😃
This was the first version, trail and error with maps.

Next version of the textured wall, I will get there, it’s all trial and error with the head of learning. In my current form, I am not ready to do, but I will get there.
I think I need a serious month with textures and not do anything else, just like how I focused on Zbrush….. Has to be done.

Once I get the hang of it, I will fly through it, I have not got this far to give up…. I WILL DO IT! 🙂
Let’s do it.
6th December 2016
Unwrapping, done!…. For now. Part one of unwrapping done, all the assets have been that are the part of the interior of the diner. and cleaning up has been done, I am sure I got more stuff to do to them, for now, I am going to texture.

Then the building blocks begin for the exterior. I am going to texture, all day tomorrow….. that is the plan

Right, swear there will be texturing, so for the next few days, it’s texturing and just texturing.
8th December 2016
The Texturing has begun!
Base texturing finally. Going through creating albedo maps. Had a few issues with Xnormals, well that was my stupidity. Was trying to bake AO maps and the settings were wrong couldn’t work them, until I fixed them. The process is texture all the interior of the Diner. get a base albedo maps going. I’m going to experiment on Thiago klefko workflow for texturing, Quixel suite and substance painter. Not forgetting Bitmap 2 Materials Creator.


10th December 2016
Happy to say, I have started to texture, finally. Unwrapping almost drove me crazy, well, not really crazy, just wanted to get it finished I have been playing around with different variations of texturing, just to refresh my memory.
I must remember, textures don’t like great in Maya, I have to drop them into Marmoset and Unreal.

See how the colour of the Diner sign looks in Maya, a little flat and ugly and honestly, it was deceiving, I thought, I was doing it wrong, I decided to drop the asset into Marmoset to see if they looked better and I got a better result, looks, prettier, so much difference in quality. This is with base texturing and no time tweaking settings in Marmoset.

Then there was the bin in Maya with all the textures created, didn’t look great, even the normal map does not look great.

The bin in Marmoset, looking better. Even Normal maps look better here. It’s the small victories. I thought I was doing something wrong with my normals as they looked bad in Maya and I am glad that is was not me. I have a lot of space to add more textures to the trash bin model, I really should add grotty looking rubbish and really make it worn down.
The front does look wonky and that has been fixed. there is a temptation to keep it.

The sign got a little tweak. The next step is to focus on the sign going to texture it up further, add a bit more detail and perhaps rework the base of the sign. I still more work to be done to it, however, I got to work on the interiors of the diner and get that looking good.

I am so much happier with what is being created, after weeks of no textures, just modelling and then the long process of unwrapping, it has finally become fun again as I have started to texture.
Not to forget, I have gained a greater understanding of the different texture maps and processes, by the end of this environment, I should have a much clearer understanding and appreciation for it.
My next step is to drop it into Unreal Engine and start testing, although, I am going to stick to texturing this month. You know, I actually look forward to doing the cars.
11th December 2016
Didn’t do the wall, that was bad of me.
My focus was on understanding materials… I have more of an understanding of the materials, however, I still have a way to go.
Got things to look shiny and rough at the same time. Most of my time was working out the materials and how they worked, so far so good, I have more to do. Also played with NDO, creating Normals is fun, seriously, I never enjoyed them and now I find myself enjoying them, must be the understanding thing. by the end of the project, I am really hoping that I’ve created something awesome. I would like to get a little faster paced with the work, however, I got to remember that I am learning some of the tools and I will pick up the pace soon.
The tables to me are starting to look like tables with the trim, I am happy about that.
The kitchen doorway looks good to me and I like it. However I really must do the interior wall of the building, I said I would, this week, I am just going to be texturing. I would really like to have the building interior textured this week and a lot of texturing done before the holiday.
Bit by bit, it is getting there.

Honestly, I really like the door, even if it has janky bits.
Then I got distracted and for a bit, I started to make a star wars pic, This will be turned into a card. Still got things to fix on it. I thought I’d share it with everyone.

Had my Christmas holiday, got a few days before the New Year party, let’s get back to it and full speed ahead.
